| AutoSampler |
Translator™ has a spiffy plugin called AutoSampler. This automatically sends MIDI notes to internal and external sound sources and record them, all automatically, and then output into any of the formats Translator™ supports. 
This is an EXCELLENT way to obtain Instruments you can't get via translation, such as copy-protected Library sets such as Kontakt Player libraries, or hardware workstations or synthesizers whihc are closed-system and the actual sample data is on ROM chip inside the unit. Of course sampling isn't as precise as translating the actual sample and real-time data. but it's better than nothing and actually quite effective if all you want is the sound itself.
To autosample an external or an internal device, follow the following steps:
External MIDI and Audio devices are standard on Mac and Windows; the ports are embedded in the operating system, and if you are using external gear, you've already installed those drivers. But virtual MIDI and Audio cables aren't standard in either the Mac or Windows, so you need to get some additional software if you record software instruments such as Kontakt, EXS24, MachFive, etc.
These are called Virtual Cables. Sometimes they are referred to a Ports, but we feel calling them Cables is more precise, since we are talking about connecting two devices at two ends. A Cable illustrates both "ends".
You need to establish a Virtual MIDI Cable, so you can send MIDI from AutoSampler to the internal software application, plus set up a Virtual Audio Cable, so you can capture the internal device's audio.
NOTE: The following expert contains external links that may become bad over time. We will attempt to keep these up to date. If any of them fail, please ask us for the latest information.)
Recording Internal Devices
Mac Virtual MIDI: Fortunately, OSX offers this natively, but you have to manually set it up. Open the Audio/MIDI Utility applet in your Mac's Utilities folder. Create a new virtual MIDI port; by default this is called "IDC Output A". After establishing this, it will then show up in the AutoSampler's MIDI Out list. You will also need to choose this in your internal device's MIDI In list.
Mac Virtual Audio: We recommend using Cycling74's free SoundFlower system (download it at Cycling74's web site). SoundFlower is a inter-application audio device. After you install it, a Audio In SoundFlower device will appear in AutoSampler's Audio In list. Again, you will need to make sure that your internal device is outputting on SoundFlower's output port.
Windows Virtual MIDI: Windows doesn't provide this, but a free driver and app called loopMIDI by Tobias Erichsen supplies this. Download it and install it. Open the app, that's all you have to do. After establishing this, it will then show up in the AutoSampler's MIDI Out list. You will also need to choose this in your internal device's MIDI In list.
Windows Virtual Audio: The one we use is VB-Audio Cable, which is free from VB-Audio Software (download it at VB-Audio Software's web site. After you install it, a "Virtual Audio Cable" device will appear in AutoSampler's Audio In list. Again, you will need to make sure that your internal device is outputting on Virtual Audio Cable's output port.
Templates
Once you have used Autosampler a couple times, you'll have some set note payouts and setups you'll want to save. You can do that in the Load/Save As... buttons to the right. Save As.. saves your current work, Load saves templates you've saved earlier. They are contained as .ast files in your Application Support folder:
| Mac: | /Library/Application Support/Chicken Systems/[appname]/AutoSampler Templates XP: %SYSTEMDRIVE%\Documents and Settings\[username]\Application Data\Chicken Systems\[appname]\AutoSampler Templates |
| WinXP: | %SYSTEMDRIVE%\Documents and Settings\[username]\Application Data\Chicken Systems\[appname]\AutoSampler Templates |
| Win8/7/Vista: | %SYSTEMDRIVE%\Users\[username]\AppData\Roaming\Chicken Systems\[appname]\AutoSampler Templates (note AppData may be hidden) |
Once you've got your ports all set up, you are ready to do some autosampling! Once you've done it a couple times, it feel like second nature. Below are the explanations for each page of the Autosampler.
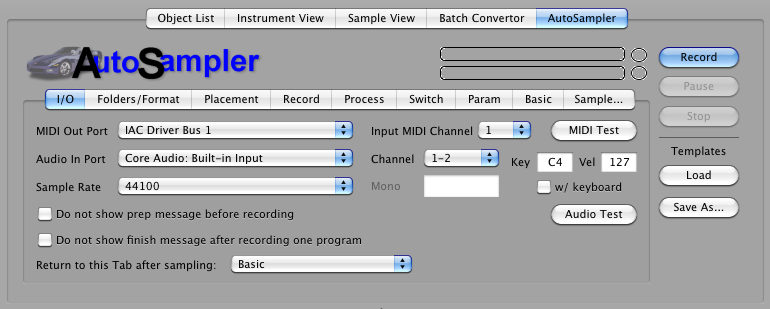
Audio/MIDI The Mono Channels textbox allows you to split stereo channels into mono when in MultiChannel mode (see the Process tab). All desired mono channels should be input in separated by commas, starting with Channel 1. Any mono channels specified negates the stereo file; for example, if the textbox reads "1,3,4,6", this means Channel 1+2 will be written as mono of Channel 1 (that is, left side) and Channel 2 will be discarded, Channel 3+4 will be written as mono versions of Channel 3 (left side) and Channel 4 (right side), and Channel 5+6 will be written as mono of Channel 6 (right side) and Channel 5 will be discarded. You can test the MIDI out with the MIDI Test button, and set the note and velocity using the selections below. Even better, check the w/keyboard check box and test using your MIDI keyboard. You can also test incoming audio by pressing Audio Test, and looking at the meters above. You may not be able to hear the audio coming in, but this should be no worry.
|
 |
Folders/Format The Create Folder checkbox creates an enclosing folder with the name of the Program you are autosampling. Otherwise all samples (if they eventually show) and program appear in the folder you select. Destination Bank File: If you choose a Bank-type output format, such as a SoundFont, Kontakt Multi or Bank. Motif, or Korg Kronos, you can choose a existing bank file/folder structure that you want the results to be written into. |
 |
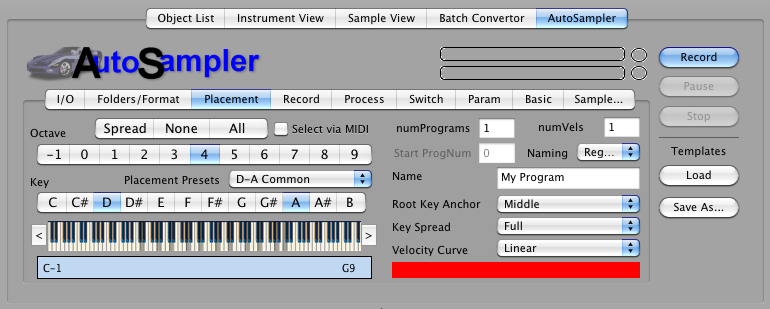
Placement We have supplied some handy Placement Presets. These are the most common placements, allowing for guitars and other common instruments. Note: the reason there is preference for sampling D's and A's is because harmonically these are much easier to loop. There is also a KeyRange slider below the keyboard graphic; this limits the keyrange extends of the ultimate Program that is created. Normally, AutoSampler fills in all spaces between notes you choose not to record (except when KeySpread is "Single Key"), so this determines the limits of the extreme low and high ranges. Note: All velocity spaces are always filled in. The keyboard graphic has arrow buttons on both sides, allowing you to shift the placed notes up or down by an octave. By pressing CTL while clicking on the arrows, you shift down by a single note. Number of Programs: This is the amount of programs you will record. If >1, a Program Change is outputted, changing the Program that you are recording. Also, Start Number is enabled, allowing you to set the beginning Program Change number that will be sent. Start Number: See above. Number of Velocities: This the amount of velocities that you will record. See Velocity Curve below for the ranges this parameter enabled if >1. Naming: This selects the naming scheme of your output files. Root Key Anchor: AutoSampler automatically sets keyranges to fill in all the notes that you aren't recording. This parameter determines hwo these are placed in respect to the note (Root Key) that you recorded. Middle means half the keyrange goes down and half goes up. LoKey means the record note is the lowest note of the range, whereas HiKey means the recorded note is the highest note of the range. Hint: although Middle is a good compromise, usually HiKey is a good selection because most audio sounds better transposed downward than upward; plus the slower playback gives it more time before a possible loop. Key Spread: Most of the time you'll select Full, which means all areas between LoKey-HiKey are filled in. When set to Single Key, the keyranges are always 1 note in length and there is no filling in of notes not recorded. Velocity Curve: This determines the velocity ranges if you are recording >1 velocities. Linear means that every range is equal in height. The Convex values mean that lower velocities are larger and higher velocites are smaller (meaning you have to hit harder to get the high velocity sounds), and the Concave values are the opposite; higher velocity sounds are more likely to be sounded. Note: to be specific, the velocities that are actually record are always the HIGHEST velocity determined by the curve. This is because everyone wants to hear the velocity=127 sound, but no one wants to hear the Velocity=1 sound, mostly. The Velocity graphic on the bottom shows you at a glance what velocities you have programmed. This reflects the Velocity Curve set. |
 |
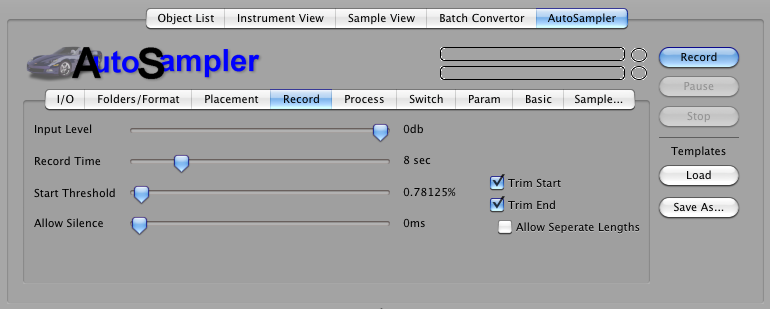
Recording Input Level: This is the input level of the audio. Generally you will want to leave this at 0db and adjust whatever is incoming with it's own controls. Recording Time: This is the amount of time recorded. Please remember that any silence BEFORE or AFTER the sound is automatically trimmed, so the final result maybe not be this amount of time. Start Threshold: This is the level of audio required for the recording to actually commence saving of the recorded audio. Allow Silence: Sometimes you want to record the extra silence after the sound has died away. This can be handy for noise reduction processing you do later. Trim Start: Trims the beginning of the sample until the Start Threshold is reached. On MultiChannel recordings this is calculated to the earliest possible location in regards to all samples, so each channel is still perfectly sample-accurately matched. (Does not apply if Process :: Do Not Trim is checked.) Trim End: Trims the end of ALL samples until the Start Threshold is reached. (Does not apply if Process :: Do Not Trim is checked.) Allow Uneven Lengths: If Trim End is selected, you can also select that AutoSampler will treat each sample individually, so all samples in a given area will not be the same length. |
 |
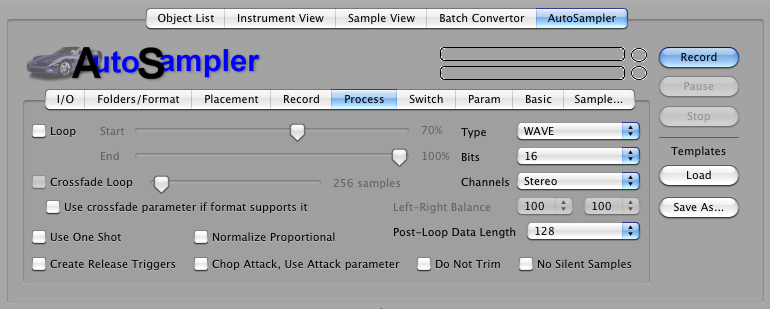
Processing Add Loop: This turns on the loop in the destination format. The slider sets the approximate loop start area you want to set. Note: This is approximate; if you choose to loop, the engine will make some decisions about the best place to loop BASED ON this parameter. CrossFade Loop: (Only available when AddLoop is checked.) This hardcodes a crossfade loop into the recorded sample. The slider determines the length of the crossfade; we recommend values around 4000 samples. Crossfade As Parameter If Available: Some samplers have a XFade parameter that crossfades a loop on the fly without having to hardcode the crossfade in the data. Checking this puts the crossfade lenth in this parameter and forgoes the hardcoding. Normalize: This boosts all samples up to 0db level at highest, with one twist: it takes the highest level in ALL the recorded samples, and normalizes all the samples regarding that level. This way, the balance of levels is preserved. This is highly recommended to be checked. Chop and Add Parameter Attack: Sometimes the data that is under a relatively slow attack is the same as the sustained portion. Checking this tells AutoSampler to truncate all data up to the highest level (before the loop start if there is one), calculate the time it took to get there, and writes the AmpEnv Attack parameter accordingly. Create Release Triggers: If checked, AutoSampler will make separate samples of when it releases the key, adn the output format will program and use these samples accordingly, plus set the release parameter to around 150-300ms. Note: if the output format does not support release triggers, AutoSampler will not create these samples, effectively ignoring this parameter. Do Not Trim: This diables the automatic trimming AutoSampler does post-recording. Again, this is often used in conjunction with the Allow Silence parameter, where you want the silence after the sound to use for your manual post-processing. No Silent Samples: If any samples created by AutoSampler are silent (no data equal above the threshold, they will not be written and not referenced by the output file. This can be handy when in MultiChannel mode and not all channels are active. Type: This is the type of sample file AutoSampler will write. If your output format uses WAVE, AIFF, or CAF files, and this parameter is chosen, this is what it will use. (AutoSampler does not recognize the usual Sample Type parameter in Format Preferences.) If you chose a Type that the destination doesn't support but supports one of the other ones, it will chose the one it supports. If your output format uses it's own sample type or stores it internally, this option makes no difference. Bits: This is the bitrate of the resulting sample. AutoSampler records in 32-bit floating point, which has more resolution than 24/16/8-bit, so any selection in those ranges will be dithered down. Most samplers only support 16-bit, and most software samplers support 24-bit, but almost none support 32-bit floating point. Hint: for "lo-fi" audio, a trick is to choose 8-bit here, than the recorded 32-bit will be dithered to 8-bit, then usually upgraded to 16-bit. This can give a lo-fi sound to the recording. Record Channels: This determines the output format of the samples. Commonly this is Stereo or Mono, but the other options put AutoSampler into MultiChannel mode. It will record stereo pairs for each incoming channel pair. Please only select one of these if your Input Audio supports that amount of channels.
|
 |
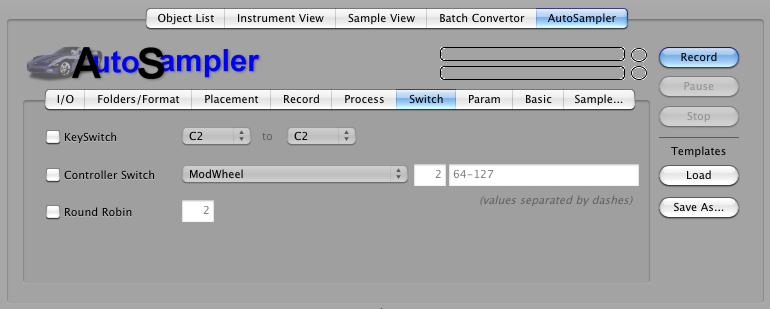
Switches For Controller switching, the values sent before recording are listed in the middle right box. You can edit them, but make sure there is one value per number of controllers you have selected. |
 |
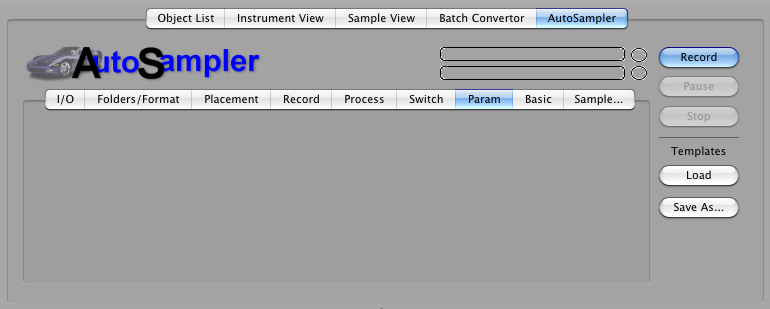
| Parameters AutoSampler gives you a selection of default parameters that will be written into your output format. This is handy for including modulators like pitch bend or LFO->ModWheel->LFO, or just the simple task of turning on the filter so you don't have to. |
 |
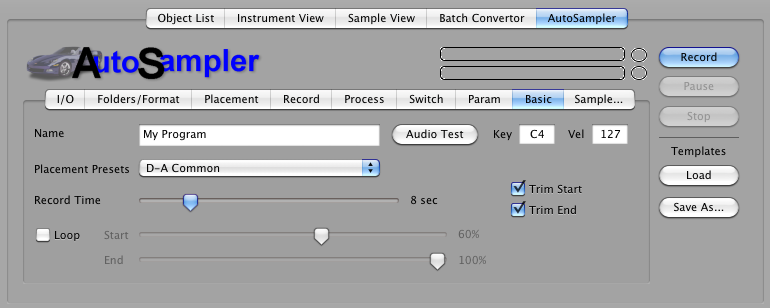
Basic Loop, Loop Start, Loop End, Program Name, Trim Start, Trim End, Placement Presets, Record Time, Channels, plus the Audio Test command button and parameters. |
 |